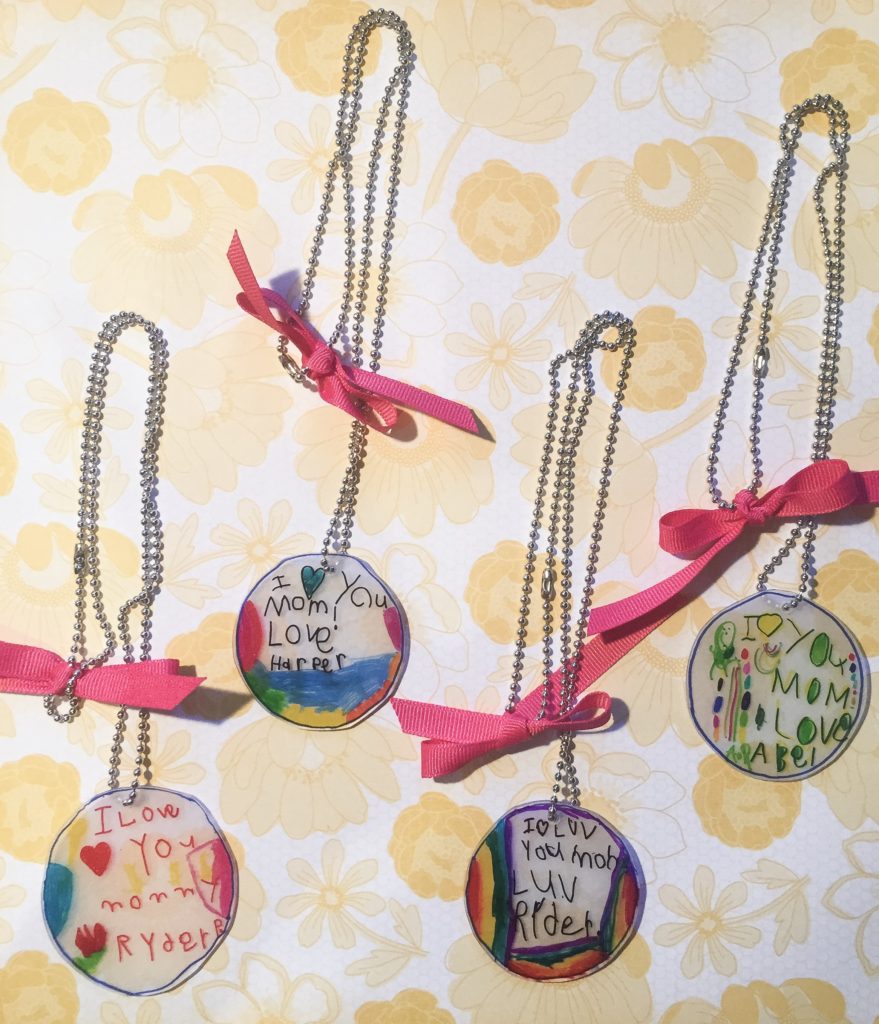
Check out this easy Mother’s and Father’s Day DIY Gift Ideas!
These simple Mother’s and Father’s Day DIY gift idea is just 7 simple steps and only 4 craft products needed! Can it get any easier than that? You can see other DIY projects by clicking here.
At the end of this post, I will also provide some simple projects to do at home using items you may have lying around. Enjoy!
*This post may contain affiliate links. If you make a purchase from one of my links, I may receive a commission or credit at no additional cost to you.*

All products can be found on Amazon! Here is what you will need:
- Scissors
- Sharpie Markers
- Shrink Film
- Hole Punch
- Necklace Chain
- Ribbon ( any kind! I recommend thin and ribbed to help with fraying)
How-to make a Mother’s Day DIY Necklace:
Step 1: Cut the shrink film in half. This will not only save you film for the future, but it allows you to not provide “extra” space for when your students are creating their project.
Step 2: Use an object to draw a circle on the smooth side of the shrink film. You can see my shape outline in the photo above.
Step 3: Using sharpie markers, have the students decorate the inside of the circle.
Step 4 and 5: Cut out around the edge of the circle, leaving about 1/3″ or more of space. When the shrink film bakes, this will help from not messing with shape. Use a hole punch to make the chain hole, again leave a good amount of space around the chain hole.
Step 6: Pre-heat oven to 325 degrees. Next, place parchment paper onto a cookie sheet. Then, Place the shrink film creations on the parchment paper with the ROUGH SIDE UP. Last, place another piece of parchment paper on top and then a cookie sheet on top of that. This is trick to help with curling of the project!
Summarize: 1. cookie sheet 2. parchment paper 3. project 4. parchment paper 5. cookie sheet
Note: they usually take 3 minutes, but this is all depending on your personal oven. The advice I can give to you is do a trial run of the similar shape that are NOT the students projects, see how long they take to get to your desired size. Then go from there.
Step 7: Let them cool! Add the chain to the necklace and tie a small bow with the ribbon!
How-to make a Father’s Day DIY keychain:
Follow the same steps above. Chang the shape to a rectangle. Add a binder ring for the keychain hook.

My students LOVED making these projects and I hope yours will enjoy it also!
Looking for some simple ideas for craft using items in your home?
- Use a plastic milk or juice carton and make it a planter for Mom’s flowers by cutting off the top, putting holes in the bottom for drainage and filling it with dirt and their favorite bloom!
- Use a Oatmeal container to make Dad a holder for his loose change or tools!
- Purchase modeling clay, have your child/student create something and bake it in the oven for a keepsake!
Have fun DIY’ing!
Related posts:


Leave a Reply
You must be logged in to post a comment.